
Experience the thrill of Dota 2, the acclaimed multiplayer online battle arena (MOBA) game created by Valve Corporation. As passionate gamers, we understand that personal preferences can change over time. If you’ve reached a juncture where your Dota 2 journey has come to an end and you seek a clean break from the game on your computer, we’re here to assist you. This all-inclusive guide offers a detailed, step-by-step walkthrough to ensure the complete and permanent removal of Dota 2 from your system. Discover how to bid farewell to Dota 2 and open up new horizons in your gaming adventures.
Step 1: Backup Your Game Data
Before proceeding with the removal of Dota 2, it’s important to safeguard your game data, including settings, save files, and replays. Follow these steps to create a backup:
- Open the Steam client on your computer and sign in to your account;
- Go to the Library section and locate Dota 2. Right-click on the game and select “Properties” from the menu that appears;
- In the “Properties” window, navigate to the “Local Files” tab and click on the “Browse Local Files” button;
- Once the Dota 2 folder opens, make a duplicate copy of the entire folder and transfer it to a secure backup location on your computer.
Step 2: Uninstalling Dota 2
After successfully safeguarding your game data, it’s time to uninstall Dota 2 from your computer. Follow these instructions to complete the process:
- Launch the Steam client on your computer and log in to your account;
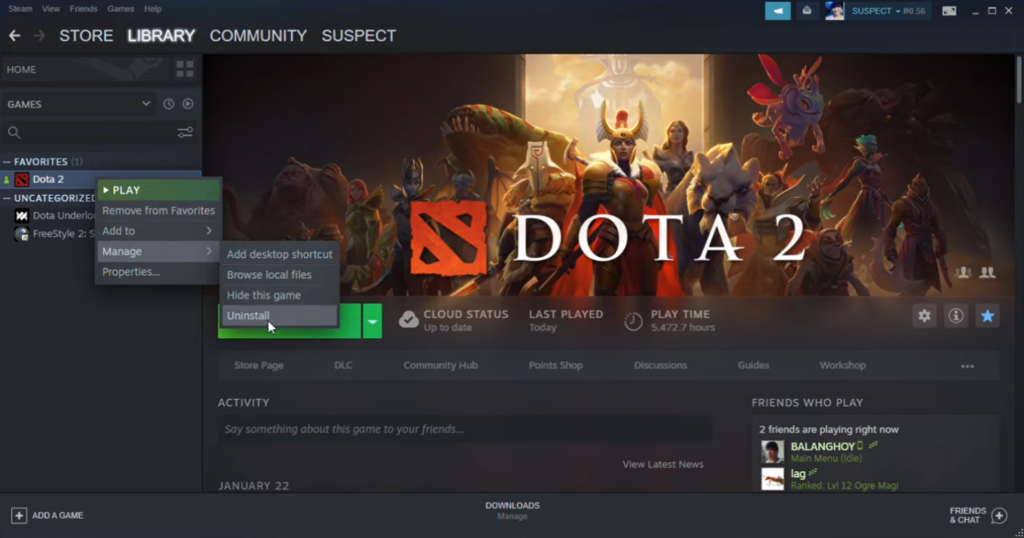
- Within the Library section, locate Dota 2, right-click on it, and choose “Uninstall” from the drop-down menu;
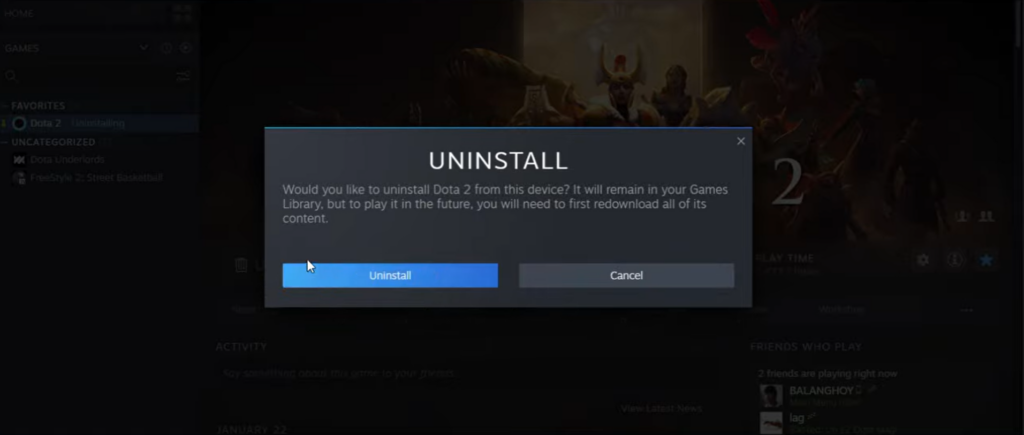
- Follow the on-screen prompts that appear, confirming your intention to uninstall Dota 2.
Step 3: Removing Dota 2 Game Files
Once you have uninstalled Dota 2, it is essential to delete any residual game files from your computer. Follow the steps below to accomplish this:
- Press the Windows key + R on your keyboard to open the Run dialog box;
- Type “%appdata%” (without quotes) into the Run dialog box and press Enter;
- Locate and open the “Roaming” folder;
- Look for the “Steam” folder and open it;
- Within the “Steam” folder, find and open the “steamapps” folder;
- Inside the “steamapps” folder, locate and open the “common” folder;
- Look for the “Dota 2” folder and delete it.
Step 4: Deleting Dota 2 from Steam Library
The last step involves removing Dota 2 from your Steam library. Carry out the following instructions:
- Launch the Steam client on your computer and log in to your account;
- Click on the “Library” section in the Steam client;
- Locate Dota 2 in your library, right-click on it, and choose “Remove from Library” from the options presented;
- Follow the on-screen prompts that appear, confirming your intention to remove Dota 2 from your Steam library.
Conclusion
Uninstalling Dota 2 from your computer is a relatively simple process that can be accomplished by following a few straightforward steps. However, it is important to note that prior to uninstallation, it is recommended to back up your game data to avoid any inadvertent loss of important files. Once you have completed the uninstallation and deleted any residual game files, you can then proceed to remove Dota 2 from your Steam library. By diligently adhering to these steps, you will effectively and permanently eradicate Dota 2 from your computer, thus freeing up valuable space for the installation of other games or programs.